Back in February, Shawna shared a worksheet to help staff create activities based on their own interests, and as promised she’s back with her tie-dye inspired activity, Ice Dye Color Theory.

Shawna found her love for tie-dye, especially using the ice dye technique, during the pandemic. We even hosted a team building where the network team made their own ice dyed t-shirts. Now it’s your turn! With the lesson plan linked above, you can bring ice dying to your program, while also providing some stealthy learning content around color theory.
Shawna realized that her love of ice dying could easily translate into an art activity, because the colors often mix or bleed together with the way the ice melts. So she devised a 3 part activity, including a demonstration, student inclusion, and t-shirt signing.
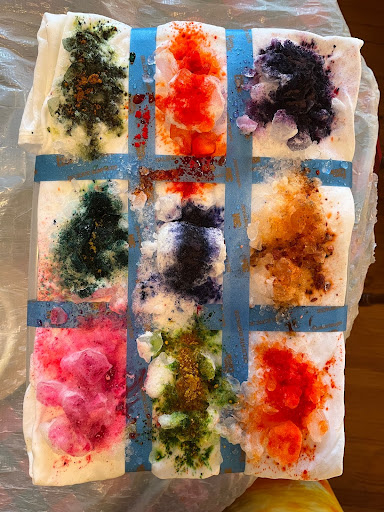
The first part of the activity is the demonstration. This is where the connection to color theory really comes into play. You’ll discuss the color wheel, primary, secondary, tertiary colors, and what colors mix together to make browns and blacks. Then you’ll take your pre-soaked t-shirt that’s folded into a rectangle on top of your screen and basin, and section it off with tape into 9 quadrants. You’ll have the students help put ice on the garment and sprinkle a different colored powder in each quadrant, like so:

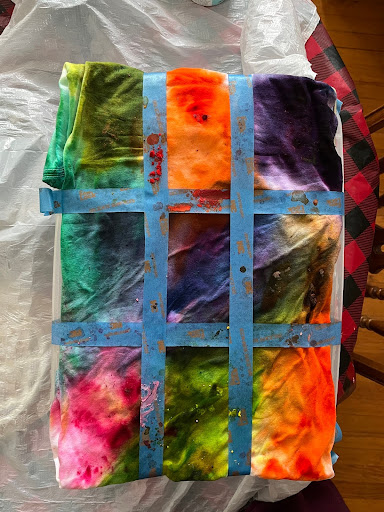
To finish up this part of the activity, you’ll make predictions with the students about what the t-shirt will look like when the ice melts, which is this:

Then you’ll take the shirt home, rinse it with cold water, and throw it in the wash on a cold cycle with a little bit of detergent. Which brings us to Part 2, the big reveal!
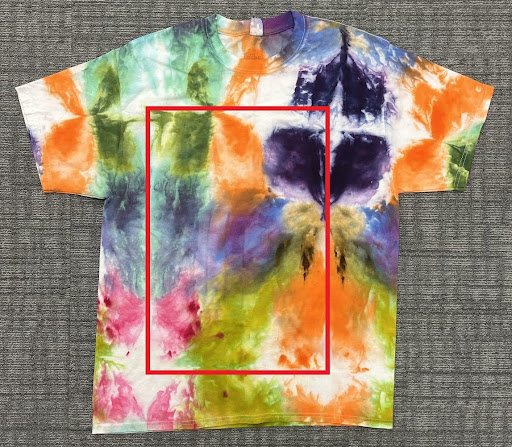
This is the t-shirt we ended up with. The red rectangle indicates where the shirt was folded and the space that held our quadrants. The square image shows the colors that we had used to dye the shirt with. We can see lots of variations, and even some colors that have been lost or broken down into their primaries.


This is also the part where the kids get to make their own t-shirts. You’ll have to make sure you initial their tags, so when you bring them home to wash, you know whose is whose. Part 3 is the simple and fun part, that makes it a great end of school year activity, T-Shirt Signing. Give students their washed t-shirts and provide them with fabric markers so they can sign each other’s shirts to commemorate the year. Don’t forget to get staff involved too.

